How to reduce airborne noise of an outdoor unit
In order to reduce the noise nuisance caused by an outdoor unit, it needs to be isolated from its surroundings. This can be achieved by means of a partial enclosure, or even better, a complete enclosure. On this page you find a DIY plan and products to make a enclosure.
Important before you start!
We provide information concerning the sound insulation of an outdoor unit. You are supposed to find out yourself to what extent this unit can and is allowed to be shielded by means of an enclosure, this falls outside the scope of our advice. In case you cannot find this information try to obtain the technical information of your equipment. Following our advice is at your own risk.
Making an enclosure
As for building a housing, use the heaviest variant of weather-resistant sheet material, such as waterproof plywood. Place the unit and the enclosure on an elevation in order to make sure rain or snow stays outside the housing. Make sure that the enclosure or the elevation does not touch the building to prevent impact noise.
The enclosure should become a solid construction in order to avoid vibrations at low frequencies. As for the dimensions of the enclosure, it is important that your outdoor unit has enough free space in- and outside the enclosure. If you want to know the exact amount of free space necessary for your unit, we refer you to its manual. We recommend you to leave a free space of at least 200 mm between the walls and the top of the enclosure and of about 300 mm between the front and back of the unit for the supply and exhaust of air. You should leave a free space of at least 500 mm surrounding the enclosure.
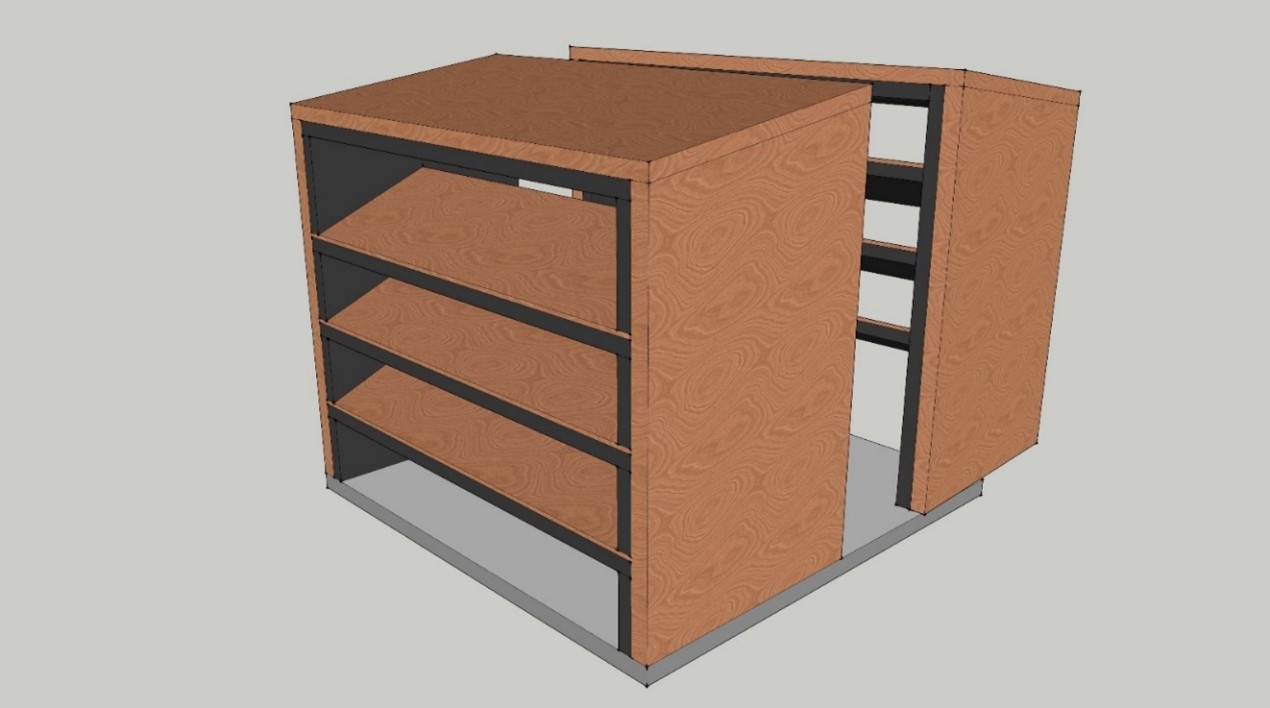
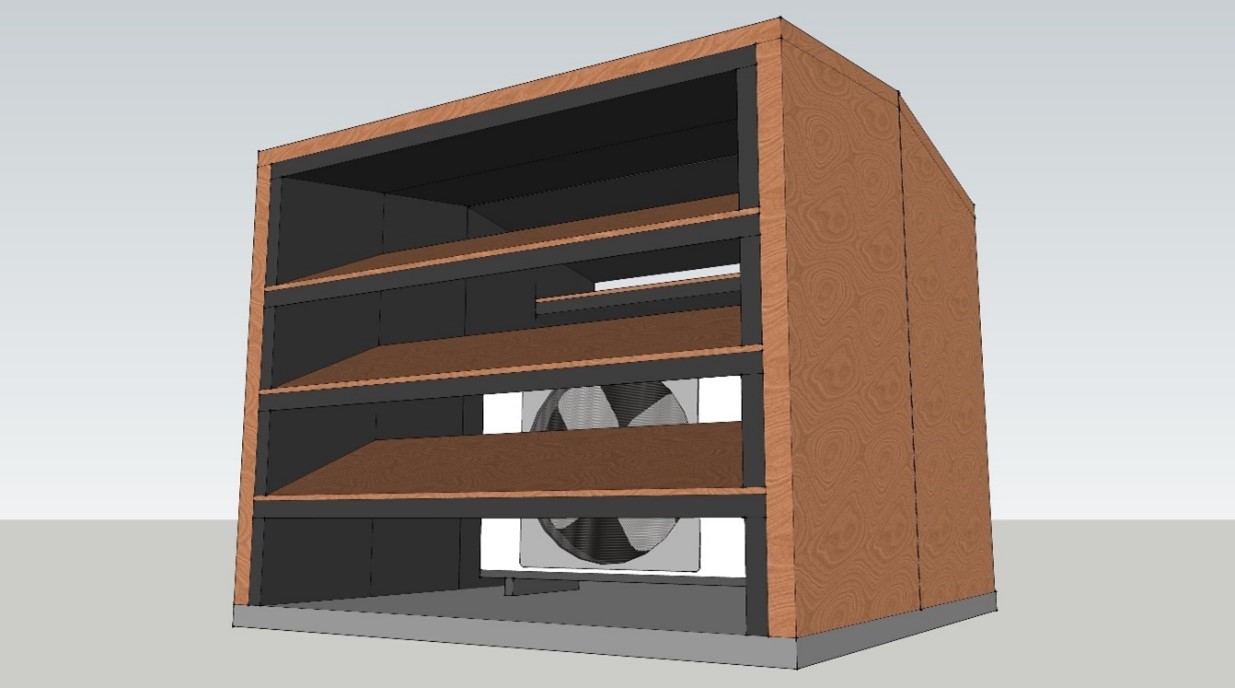
The most practical enclosure consists of two equal parts that can be taken apart, which is convenient in case of maintenance. Equip one part of the enclosure with a divider, from which you cut out the shape of the unit. This divider separates the in- and the outflow of air, it divides the enclosure in the inside in a front- and back. As such, the unit cannot recirculate the exhausted air. In the end, recirculating air makes your unit a lot less efficient!

Wooden enclosure that consists of two parts containing black sound insulation.
Making sound absorbing louvers
The louvers of the enclosure, depicted as the angled openings at the front- and back, provided with black Akotherm sound insulation material, are the most important parts. The louvers are made from the same material as the enclosure and should be provided with Akotherm Basic D40 underneath. This causes sound to be absorbed before it leaves the enclosure. The sharper the angle and the more louvers you place, the more sound is being insulated. Pay attention to the fact that this does mean that less air can be supplied and exhausted! If you happen to be very handy, you can make adjustable louvers.
Pay attention to the distance and the thickness of the absorption material as well, we advise to us Akotherm with a thickness of at least 40 mm. The measurements of the openings between the louvers you have to decide yourself. Usually, the supply and exhaust of air should be sufficient if you can still see the unit from the outside at a certain angle.

The unit is still visible through the openings of the heat pump enclosure
Additional tips
- Make the top of the enclosure at an angle to prevent water from on top of the enclosure.
- Install wire netting at the front and back of the louvers to prevent birds from building a nest inside.
- Put outdoor units as far away from neighbours as possible, out of sight, behind a closed fence and equip this fence if necessary with absorption material like Stratocell Whisper, this reduces noise radiating to the surrounding area.
- If you build a partial enclosure were absorption material might get wet by rain, you should also use Stratocell Whisper.
Questions? 
If you have questions concerning this topic, feel free to contact us. We cannot advise you on technical matters of air-conditioning or heat pump installations.

 Sound Insulation
  Soundproofing
  Vibration Isolation
  Silent Ventilation
  Accessories
  Thermal & Acoustic Insulation